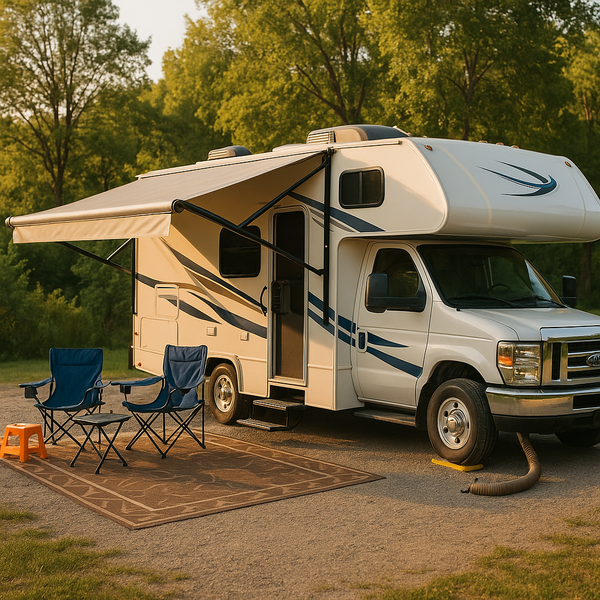
Embarking on an RV adventure promises freedom and flexibility, but arriving at your destination requires a few essential steps before you can relax and enjoy the surroundings. Properly setting up your recreational vehicle is crucial for comfort, safety, and the smooth operation of all its systems. This guide will walk you through the process, ensuring your campsite becomes a perfect home base quickly and efficiently every time you arrive.
Arriving and Parking Your RV
The initial step upon reaching your campsite is careful arrival and positioning. Before pulling into the site, walk it to check for obstacles like low branches, rocks, or uneven ground. Note where utility hookups are located (water, power, sewer) relative to your RV's connections. This helps you park correctly the first time. When backing in or pulling through, use a spotter outside the vehicle to guide you, watching for clearances and ensuring you align properly with your planned spot. Once parked, engage the parking brake firmly. If on a significant incline, consider using wheel chocks immediately behind the tires before proceeding further.
Leveling Your RV for Stability
Leveling the RV is vital for comfort and proper operation of appliances like refrigerators, which often require a level surface to function correctly. There are several methods depending on your RV type. For travel trailers and some fifth wheels, you might use leveling blocks or ramps under the tires before unhitching. For motorhomes, hydraulic or electric leveling jacks are common. Manual jacks can also be used. Use a bubble level placed on the floor or counter to check side-to-side and front-to-back levelness. Extend jacks or add blocks as needed until the RV is stable and level. Never use stabilizer jacks (if you have them) for leveling; they are for reducing sway after leveling is complete.
Connecting Your RV to Utilities
Connecting utilities ensures you have power, water, and sewer access. Always connect power first, but ensure the circuit breaker on the pedestal is off before plugging in your RV's power cord. If using a surge protector or electrical management system, plug it into the pedestal first, then plug your RV cord into it. Once connected, flip the breaker on. For water, use a potable water hose (never a standard garden hose) and a water pressure regulator, especially if you're unsure of the campground's pressure. Connect the regulator to the spigot, then the hose to the regulator and your RV's city water inlet. Turn on the spigot slowly. If you're filling your fresh water tank for boondocking, use the freshwater fill inlet instead. Sewer connection is typically the last step and often involves connecting a sewer hose from your RV's waste valve outlet to the campground's sewer connection. Ensure the hose is properly secured at both ends. Keep waste tank valves closed until you are ready to dump.
Setting Up Stabilizers and Slide-Outs
With the RV leveled and utilities connected, you can enhance stability and expand living space. If your RV has manual or electric stabilizer jacks, extend them until they make firm contact with the ground or blocks placed beneath them. Remember, these are for stability, not leveling. If your RV has slide-outs, extend them after leveling and stabilizing. Ensure the area outside the slide-outs is clear of obstructions. Operate slide-outs one at a time, following your RV's specific instructions. Extending slide-outs significantly increases your usable interior space, making the RV feel much larger and more comfortable for your stay.
Additional Campsite Setup Steps
Beyond the core RV hookup process, several other steps contribute to a comfortable and secure campsite. Deploy your awning for shade and shelter, ensuring it is secured and angled for proper water runoff. Set up outdoor furniture, grills, and decorations. Check all exterior compartments are closed and secured. Inside the RV, unlock refrigerators and secure any travel restraints on appliances or doors. Turn on lights and appliances as needed. Perform a quick walk-around to ensure all connections are secure and there are no immediate issues like leaks. Familiarize yourself with the campground's amenities and rules.
Troubleshooting Common Setup Issues
Even with careful steps, you might encounter problems. If your power doesn't work, check the pedestal breaker, your RV's main breaker, and any GFCI outlets inside. For water issues, check the spigot is on, the pressure regulator isn't faulty, and the hose isn't kinked. Sewer problems usually involve hose connections or clogged outlets; ensure your valves are open when dumping. If your RV isn't leveling correctly, re-evaluate your block placement or jack function. Consulting your RV's owner's manual is always a good first step for specific issues.
Ensuring Safety and Security
Safety should be paramount during and after setup. Test smoke detectors and carbon monoxide alarms. Understand how to operate your propane system safely and know the location of emergency shut-off valves. Keep fire extinguishers accessible. Secure your RV doors and windows when leaving the site. Be aware of your surroundings and campground safety protocols. Properly store food to avoid attracting wildlife. Consider surge protectors and anti-theft devices for added security for your valuable RV and equipment.
Completing these setup steps transforms your RV from a vehicle into a comfortable and functional home away from home. Taking the time to do it right ensures a smoother, safer, and more enjoyable camping experience from the moment you arrive until the day you depart.

